Azure Service Principal expiration Teams alerting
16 Apr 2021 - Michal Stovicek
If you are using Microsoft Azure as your cloud provider, I bet you run into situation when you had to create an application in Azure Active Directory, create a service principal and use the Application ID and it’s secret somewhere. This may be pretty common scenario for CI/CD when the pipeline workers are not located in your Azure network and hence you can’t use Azure Managed Service Identity (MSI). But how do you make sure that the credentials do not expire without anyone knowing it? One way of dealing with such situation is to use Azure Automation Account and write a PowerShell script and that’s exactly what I am going to show you in this post.
The script looks as follows:
Disable-AzContextAutosave –Scope Process

$ExpirationDays = $null
try {
    $ExpirationDays = Get-AutomationVariable -Name SPExpirationDays `
      -ErrorAction Stop | Invoke-Expression
}
catch {
    $ExpirationDays = 0 .. 5 + 7, 10, 15, 20, 30
}

$TeamsWebHookUri = Get-AutomationVariable -Name TeamsWebhook

$connection = Get-AutomationConnection -Name AzureRunAsConnection
while (!($connectionResult) -and ($logonAttempt -le 5)) {
    $LogonAttempt++
    $connectionResult = Connect-AzAccount `
        -ServicePrincipal `
        -Tenant $connection.TenantID `
        -ApplicationId $connection.ApplicationID `
        -CertificateThumbprint $connection.CertificateThumbprint

    Start-Sleep -Seconds 30
}

try {
    $AzureADApps = Get-AzADApplication -ErrorAction Stop
}
catch {
    Write-Error "Can't get the Azure AD applications"
    exit 1
}

$AppsWithCredentials = foreach($App in $AzureADApps) {
    try {
        $Credentials = Get-AzADAppCredential -ApplicationId $App.ApplicationId -ErrorAction Stop
    }
    catch {
        Write-Error "Can't get credentials for Azure AD app '$app.DisplayName' (ID: $app.applicationId)"
        continue
    }
    if (!$Credentials.EndDate) {
        continue
    }

    [PSCustomObject]@{
        'ApplicationId' = $App.ApplicationId;
        'DisplayName'   = $App.DisplayName;
        'Keys'          = foreach ($Credential in $Credentials) {
                [PSCustomObject]@{
                'KeyType' = $Credentials.Type
                'KeyId'   = $Credential.KeyId
                'EndDate' = $Credential.EndDate
            }
        }
    }
}

foreach ($App in $AppsWithCredentials) {
    foreach ($ExpirationDay in $ExpirationDays) {
        foreach ($AppKey in $App.Keys) {
            if ((Get-Date $AppKey.EndDate).Date.AddDays(-$ExpirationDay) -eq (Get-Date).Date) {
                # Define Teams Message Card body
                $TeamsMessageJSONBody = [PSCustomObject][Ordered]@{
                    "@type"      = "MessageCard"
                    "@context"   = "http://schema.org/extensions"
                    "summary"    = "Service Principal Expiration Warning!"
                    "themeColor" = '0078D7'
                    "sections"   = @(
                        @{
                            "activityTitle" = "Service Principal Exires in $ExpirationDay days!"
                            "facts"         = @(
                                @{
                                    "name"  = "Application Name"
                                    "value" = $App.DisplayName
                                },
                                @{
                                    "name"  = "Application ID"
                                    "value" = $App.ApplicationId
                                },
                                @{
                                    "name"  = "Key Type"
                                    "value" = $AppKey.KeyType
                                },
                                @{
                                    "name" = "Key ID"
                                    "value" = $AppKey.KeyId
                                },
                                @{
                                    "name"  = "Expires at"
                                    "value" = $AppKey.EndDate
                                }
                            )
                        }
                    )
                }
                $TeamMessageBody = ConvertTo-Json $TeamsMessageJSONBody -Depth 10
                $TeamsWebhookParameters = @{
                    "URI"         = $TeamsWebHookUri
                    "Method"      = 'POST'
                    "Body"        = $TeamMessageBody
                    "ContentType" = 'application/json'
                }
                Invoke-RestMethod -Uri $TeamsWebhookParameters.URI -Method $TeamsWebhookParameters.Method `
                    -ContentType $TeamsWebhookParameters.ContentType -Body $TeamsWebhookParameters.Body
            }
        }
    }
}
The above script uses two variables from the Automation Account configuration:
- TeamsWebhook - This is the Webhook URL created in MS Teams.
- SPExpirationDays (OPTIONAL) - This is a string value of dayes which should be checked for expiration.
For example:
1 .. 5 + 10, 15, 30will be loaded as a list into a script variable which would be otherwise defined as$MyVar = @(1, 2, 3, 4, 5, 10, 15, 30). If not defined, the default is0 .. 5 + 7, 10, 15, 20, 30.
The script loads the variables stated above, logs in to Azure and gets all the apps which have any kind of credentials - either password or X509 Certificate. Those credentials are then checked against current date and if there is a match with one of the defined expiration days it will send a message to Teams using webhook. The message is formated as Message Card, but it is possible to updated the script so that it uses different kind of card such as Adaptive Card.
ALright, so before we can run the actual PowerShell script, we need the previously mentioned Azure Automation Account. Let’s stay with PowerShell and create the Automation account with it:
PS> $ResourceGroup = 'rg-mstov-dev'
PS> $AutomationAccountName = 'aa-credentials-expiration'
PS> $Location = 'westeurope'

PS> New-AzAutomationAccount -ResourceGroupName $ResourceGroup -Name $AutomationAccountName -Location $Location

SubscriptionId        : xxxxxxxx-xxxx-xxxx-xxxx-xxxxxxxxxxxx
ResourceGroupName     : rg-mstov-dev
AutomationAccountName : aa-credentials-expiration
Location              : westeurope
State                 : Ok
Plan                  : Basic
CreationTime          : 4/1/2021 1:44:22 PM +02:00
LastModifiedTime      : 4/1/2021 1:44:22 PM +02:00
LastModifiedBy        :
Tags                  : {}
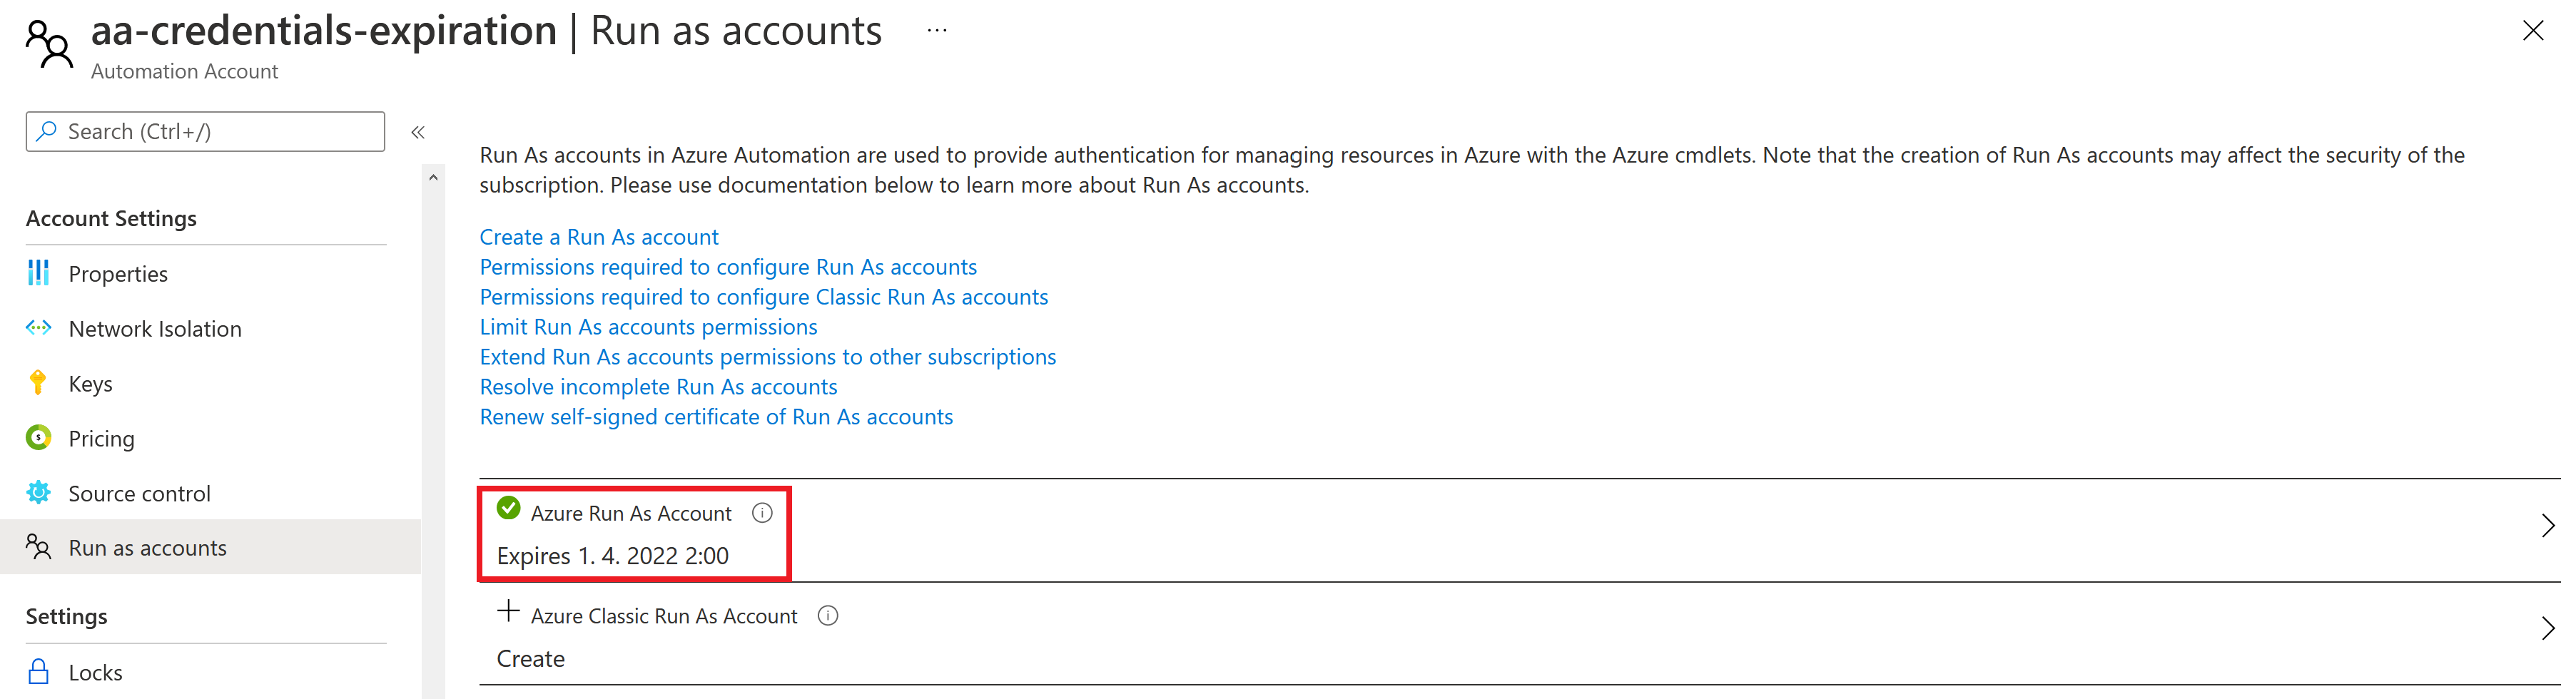
The Azure Automation Account has a feature called Run As Accounts where you just click Create and a new Service Principal registration in the Azure AD will be created for you, certificates generated and the SP will have Contributor access to the Subscription where your Automation Account is located. Main problem with it right now is that you can only create the Run as account only via the Azure portal if you don’t want to generate certificates, create an Azure AD service principal and so on (which is the case with any other automation tool such as PowerShell, Terraform and so on). Because of this limitation, I’ll create the account via portal just for the demonstation purposes. You may want to use PowerShell and generate certificates according to the Create Run As Account documentation. You may also take the steps from the Microsoft provided PowerShell script and use for example Terraform to implement the solution.
Now that the Azure AD application has been created, I can remove the Contributor role from the subscription since the script in the Automation Account should have access to the Azure AD only. To do that, I can use PowerShell once more:
$AutomationAccountApplication = Get-AzADApplication | where DisplayName -Match $AutomationAccountName
$CurrentSubscriptionId = ((Get-Azcontext | select -Property Subscription).Subscription).Id

Get-AzRoleAssignment -Scope "/subscriptions/$CurrentSubscriptionId" | `
  Where-Object DisplayName -EQ $AutomationAccountApplication.DisplayName | `
  Remove-AzRoleAssignment
Right now we have an Azure AD application but we need to assign couple of API permissions to that application (to the service principal actually) so that it can list objects in Azure AD. The application has to have Azure Active Directory Graph Application.Read.All permission so that it can get the required information about the apps. Admin consent must be granted on that permission so that it can be used with the Automation Account Runbook. Here is how it looks like:

Once all of the above is done we will need to import two modules to the Automation Account - Az.Accounts and Az.Resources - since the script uses Az commandlets (the Auatomation Account has only AzureRM commandlets by default). This can be achieved from the portal by clicking on Modules in the left pane (under Shared Resources) and then click Browse Gallery at the top. There you can search for the modules and import them to your Automation Account. This can be done using Powershell for sure, but it is not as easy as one would think. For example, you can’t directly install modules from the Powershell Galleyry since the Automation Account doesn’t have NuGet package manager and so on. So, it is possible, but you will need to do some research on that.
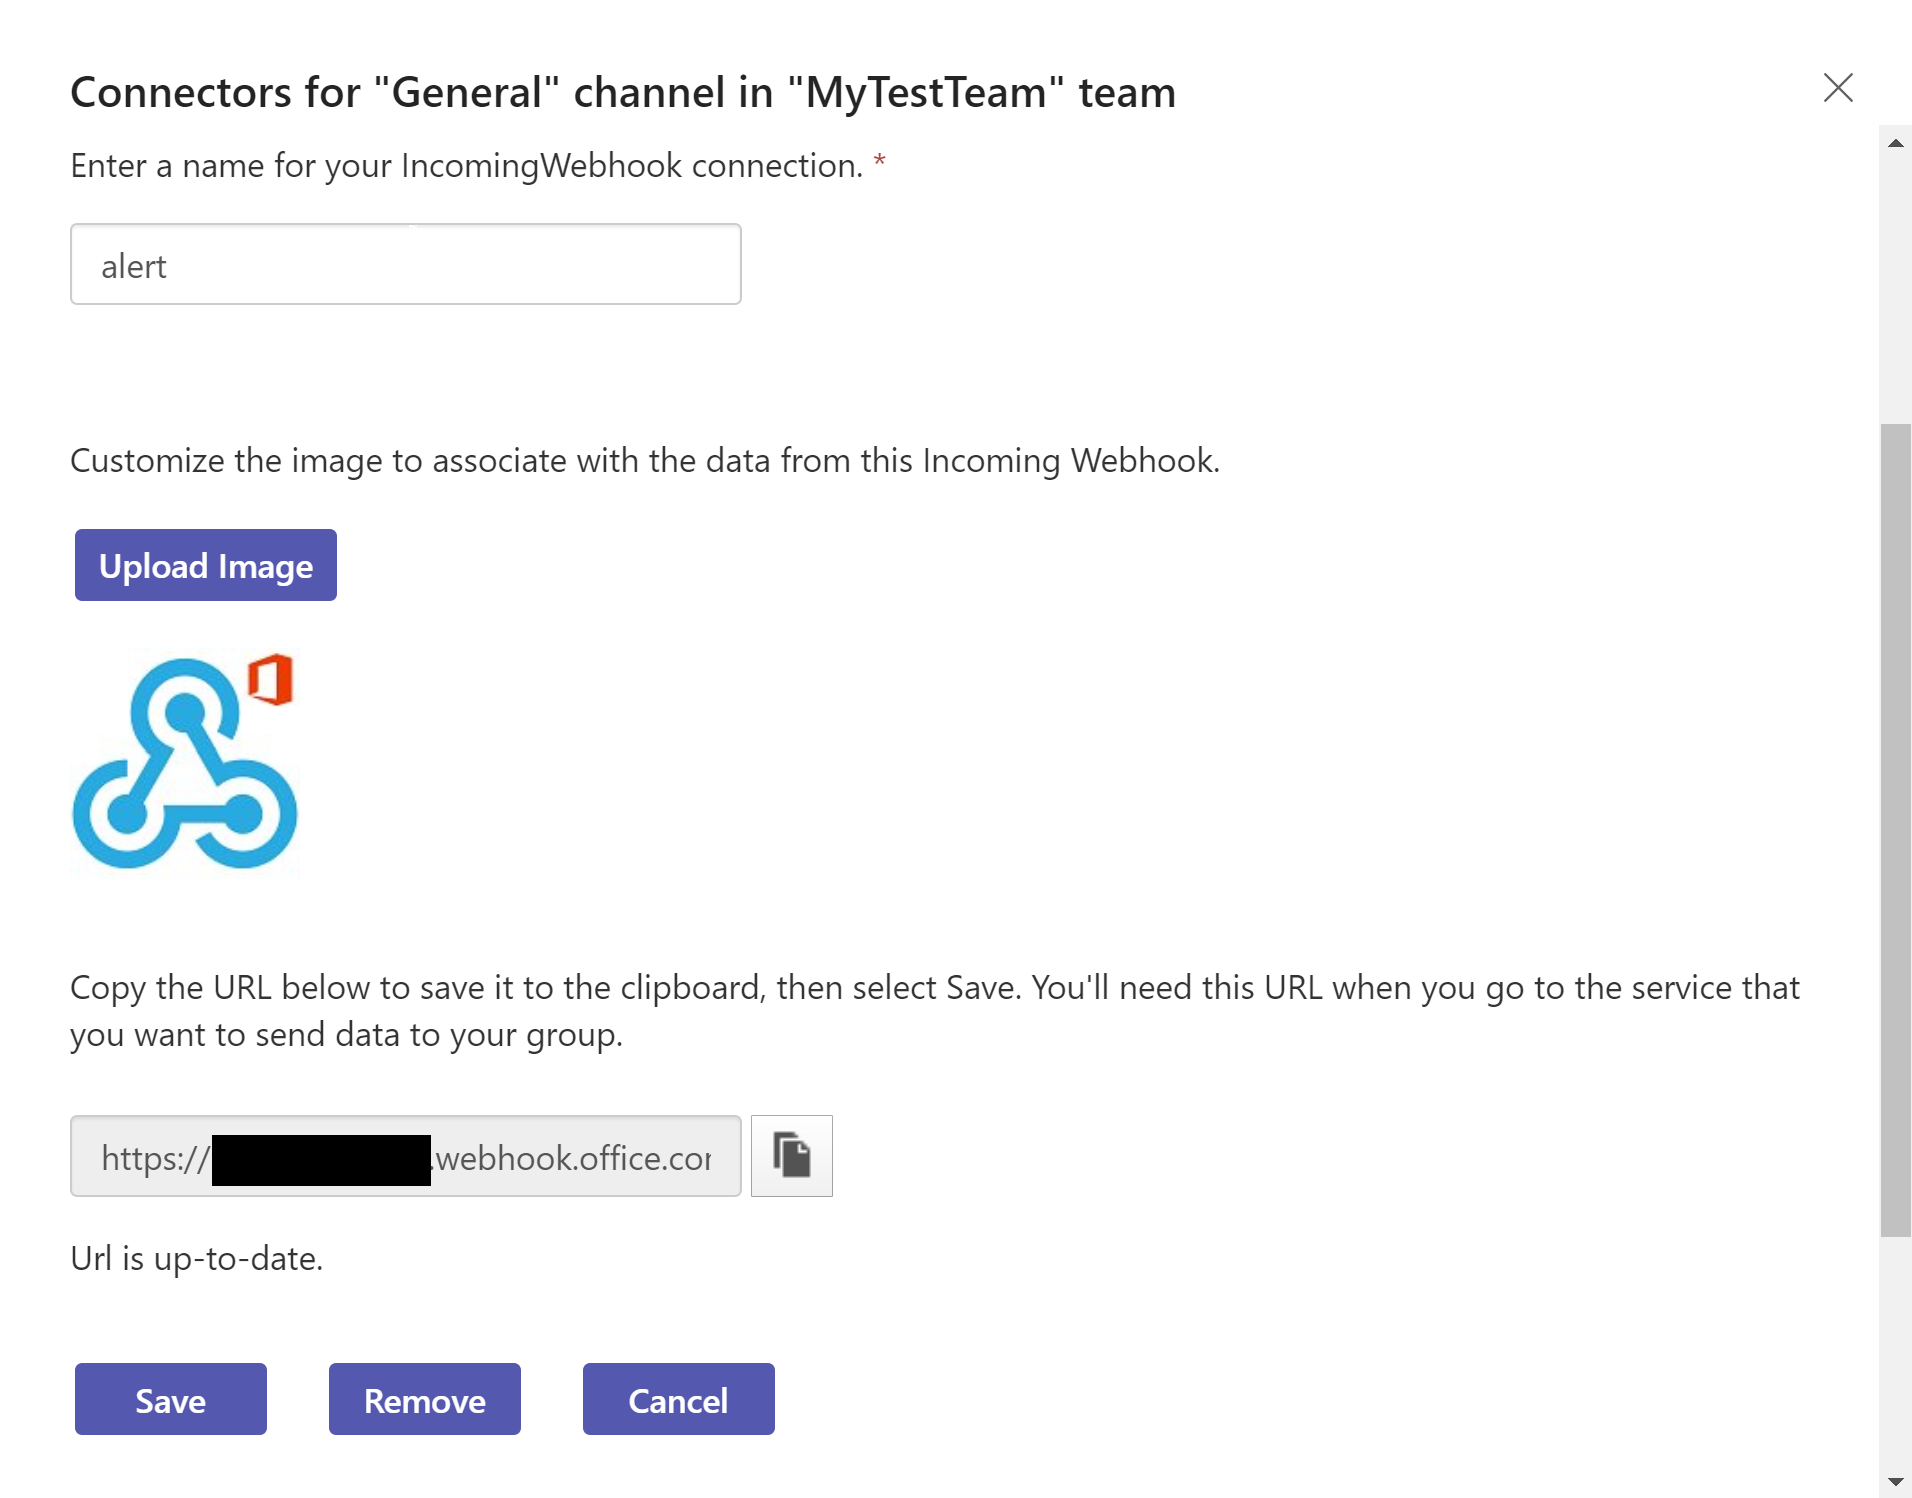
One last thing remains to finish the Automation Account configuration and that is to create a Variable named TeamsWebhook which will hold the webhook URL. First we need to create the webhook in MS Teams. We can do that by right click on a Teams channel we want to use for the notifications and then Add Incomming Webhook. You just put a name and copy the webhook URL and then Save. The following screenshot shows how it looks like when creating the Webhook:
We are going to create two Automation Account Variables actually and they can be created via PowerShell as follows:
$TeamsWebhook = "<MY_TEAMS_WEBHOOK_URL>"

New-AzAutomationVariable -ResourceGroupName $ResourceGroup `
  -AutomationAccountName $AutomationAccountName `
  -Name TeamsWebhook `
  -Encrypted $true -Value $TeamsWebhook

New-AzAutomationVariable -ResourceGroupName $ResourceGroup `
  -AutomationAccountName $AutomationAccountName `
  -Description "Holds days to expiration" `
  -Name SPExpirationDays -Encryption $false `
  -Value "200 .. 220"
Notice that I’ve used value of 200 .. 220 for the SPExpirationDays. This is because I want to match some of the Service Principals to see the Teams Message. So, we are done with the configuration and can upload our PowerShell runbook now:
$RunbookName = "SPExpirationChecker"
$ScheduleName = "EveryDaySchedule"
$StartTime = (Get-Date "08:00").AddDays(1)

Import-AzAutomationRunbook -ResourceGroupName $ResourceGroup `
  -AutomationAccountName $AutomationAccountName `
  -Path .\SPExpirationChecker.ps1 `
  -Description "Check for expiring Service Principal credentials" `
  -Name $RunbookName -Type PowerShell -Published

New-AzAutomationSchedule -ResourceGroupName $ResourceGroup `
  -AutomationAccountName $AutomationAccountName `
  -Name $ScheduleName -StartTime $StartTime `
  -DayInterval 1

Register-AzAutomationScheduledRunbook -ResourceGroupName $ResourceGroup `
  -AutomationAccountName $AutomationAccountName `
  -Name $RunbookName -ScheduleName $ScheduleName
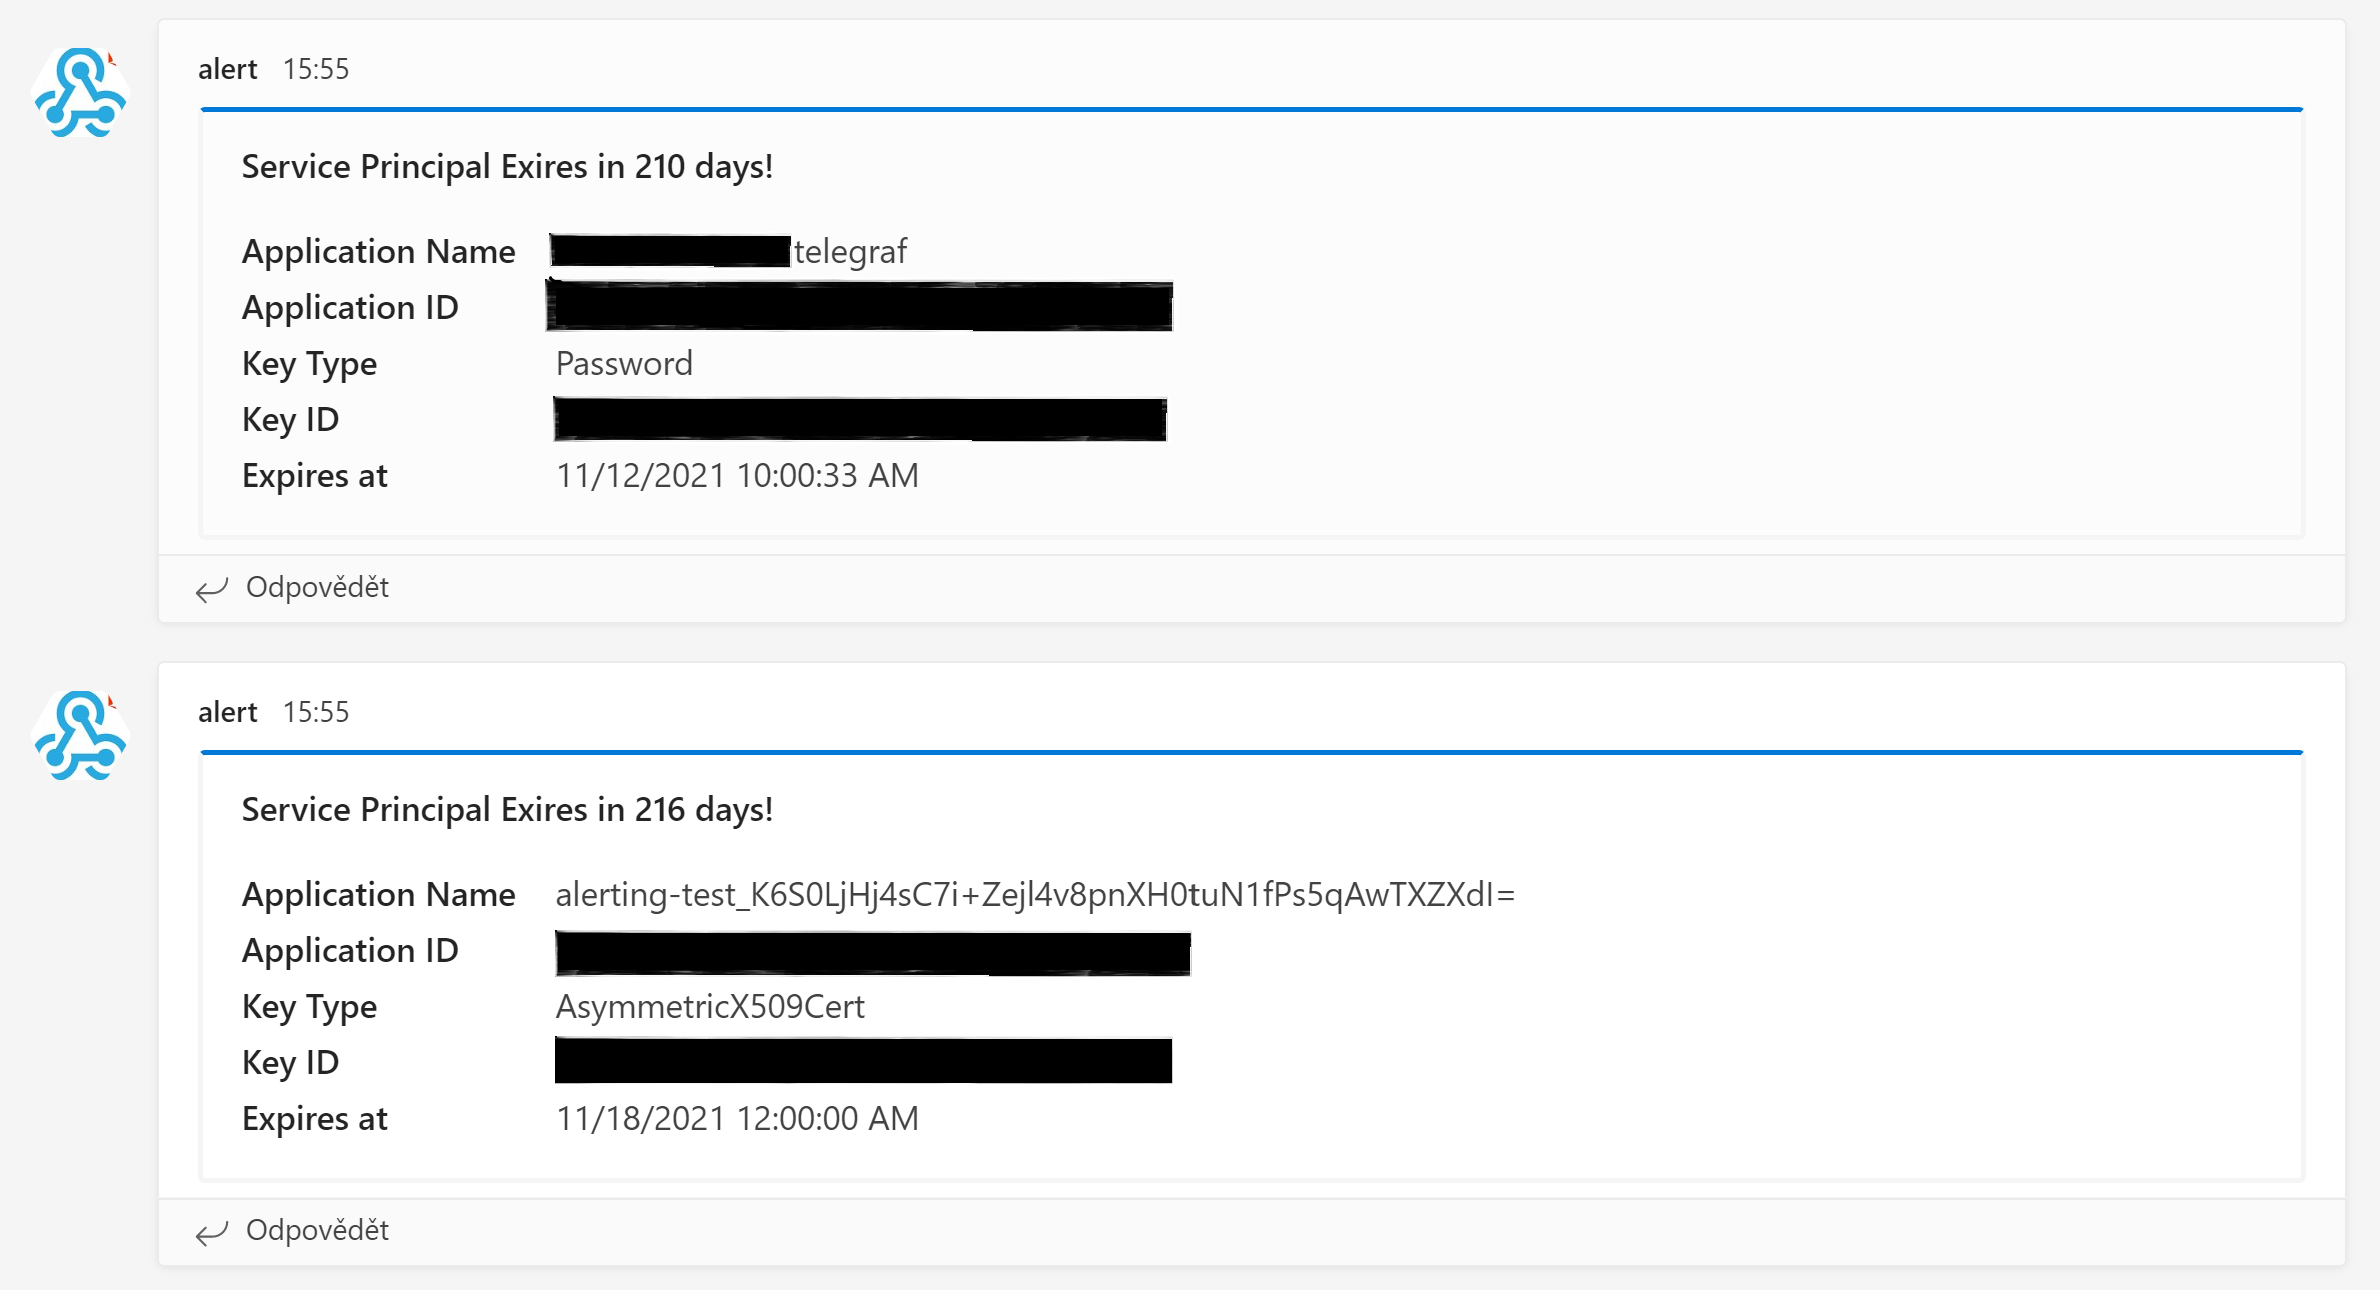
And that’s it! Now when there is any credential which is going to expire, you will see a Teams message similar to this one:
I hope you find this useful Service Principal credentials checking useful. You may also check my Github repo for Azure Automation where I’ve put the script from this post as well as a script which handles Azure Monitor alerts (uses Azure Automation Account as well, so you can import it to your existing account and point alerts to it). More scripts will probably come to that repo.